
Hey all! I’m slowly but surely getting around to showing you some of the bigger projects we’ve completed around the house the past several months. (Check out the “small closet turned master walk-in closet” project here in case you missed it.)
Today I’m showing you our recent deck transformation! (View previous deck updates here)

A few years back we stained our deck with Behr’s weather-proofing deck stain. It looked pretty good for about a month, but it unfortunately didn’t take long for it to start wearing/peeling off (it actually happened so fast that I never even captured a decent picture of what the fresh stain looked like before it started coming off!)
We are not sure if it’s because it was simply bad stain or we did a poor job with proper prep prior to applying it (or both?), but either way, we knew the next time around we were going to hire it out to avoid the chance of it happening again. In addition to the discoloration on the deck, there were several boards closest to the house that were rotting and in need of replacement.
I did some inspiration-seeking on Pinterest and opted to go with a two-toned paint look rather than your typical stain. (See a few examples I liked here — 1, 2, 3). I figured it would give the deck a more custom look and also be easier for making touch-ups down the road.
Once I had a concrete idea of what I wanted, I hired a local business to do the honors! (If you’re in the Rochester area, check out Sean Krudwig Remodeling!) Sean power-washed, sanded, replaced 80 ft. of rotted boards, and painted two coats of white on the rails as well as two coats of gray on the base, and all within 4 days. While I am all for DIY-ing most projects, the combination of being pregnant (avoiding fumes) and the thought of painting all those spindles (yet again) made hiring this particular project out a no-brainer.
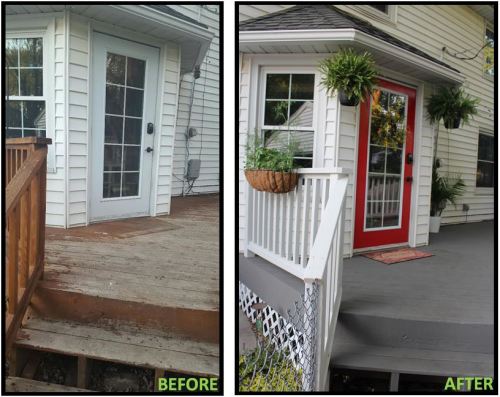

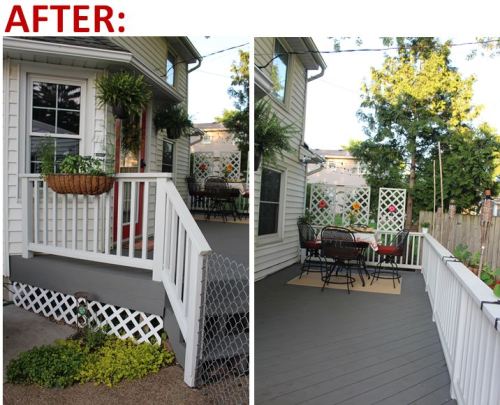

Once all the painting was done, it was time for the fun part — the finishing touches! I had the hubs cut, paint & reinstall our trellis/lattice panels along the back of the deck to match the newly-painted white rail. We also added back our tiki torches, outdoor hanging lights, and some hanging plants + deck planters. Lastly, I decided the space was lacking color so we painted the back door red to match our front door for a pop! I love how it turned out.
Here are a few more “after” pictures:
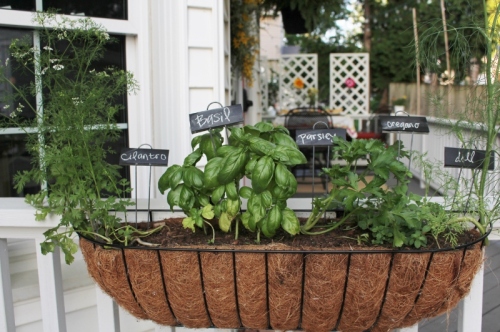
Our herb garden is doing great!

The ground cover I planted in this space is really thriving. I had to transplant the other items I previously had in this spot because of how much it was taking over. (You can see what this little area used to look like when it was just filled with landscape rock and got a much-needed garden upgrade.) For $10, I also replaced the lattice that you see there with a white plastic piece cut to size. The previous strip was wood and no longer matched the deck colors, plus it was starting to fall apart.


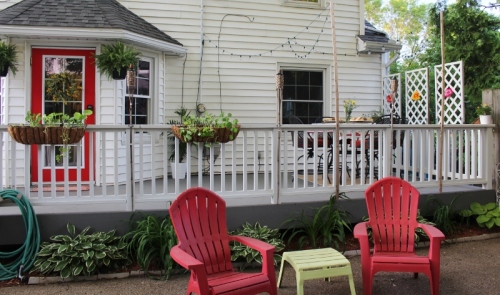
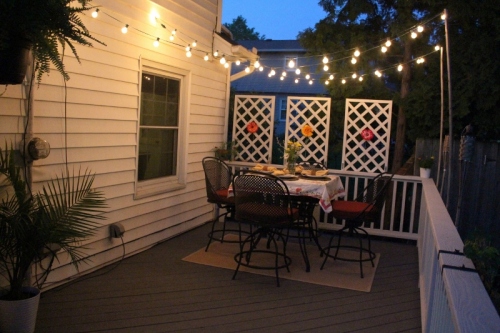


The deck went from being an eyesore to a place people actually want to hang out!
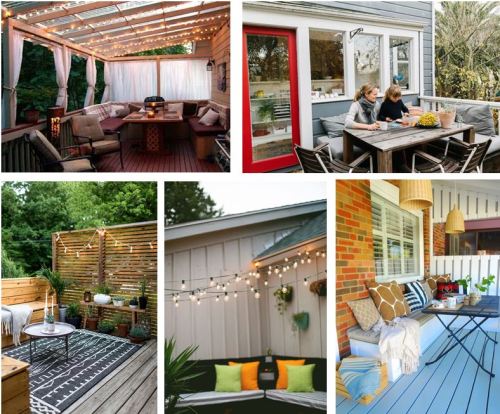
Down the soon-ish road I’d like to swap out our current high-top dining set for built-in benches and an actual dining table to be able to a) add storage and b) seat more than four people (see inspiration below). But that’s for another day ;)
 {find sources for above photos from my Pinterest board}
Until next time!


It looks great!
I love following your DIY projects! You have such a good eye!
WOW!! I mean, WOW! Jeanette. You’ve already transformed this space completely. Looking forward to its next phase of benches & storage. You are a real dream to work with! ENJOY <3