
A few months back, I shared with you my top 10 suggestions for being a budget-savvy bride — ultimately planning a wedding with the cost in mind, rather than irrational visions you’ve accrued over the years of your ‘dream wedding.’ A little harsh? Perhaps. But if you follow my tips, then you (and your bank account) just might thank me later! I digress. Back to what this post is about. I had mentioned that I’d make sure to share my various DIY wedding projects when it was all said and done. And so here we are.
The following projects were centered around the idea of saving money and trying to incorporate as many reused items as possible, all while staying in my nature-esque autumn theme. (Not shown: invites, RSVP cards and programs). Check it out:
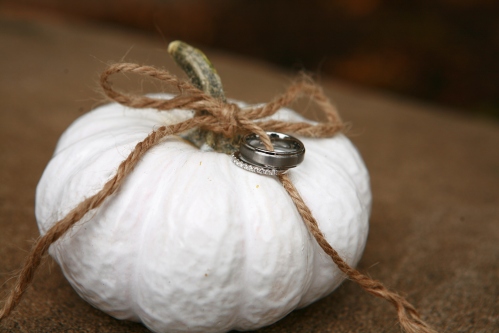 DIY #1: ring bearer “pillow.” A white spray-painted pumpkin + twine. Too easy!
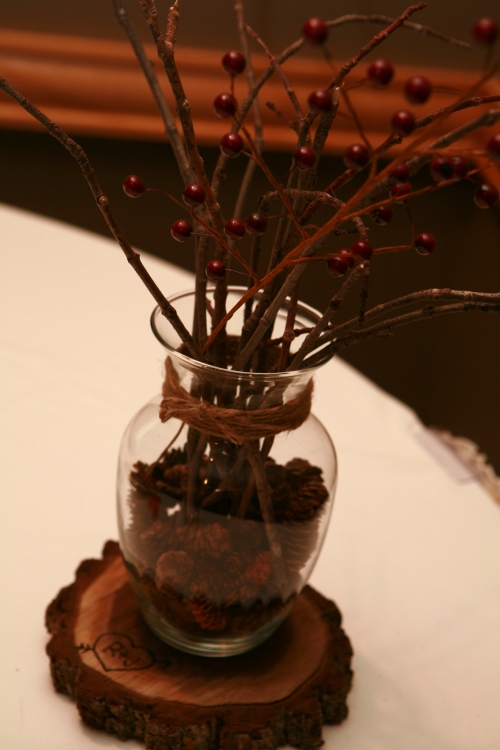
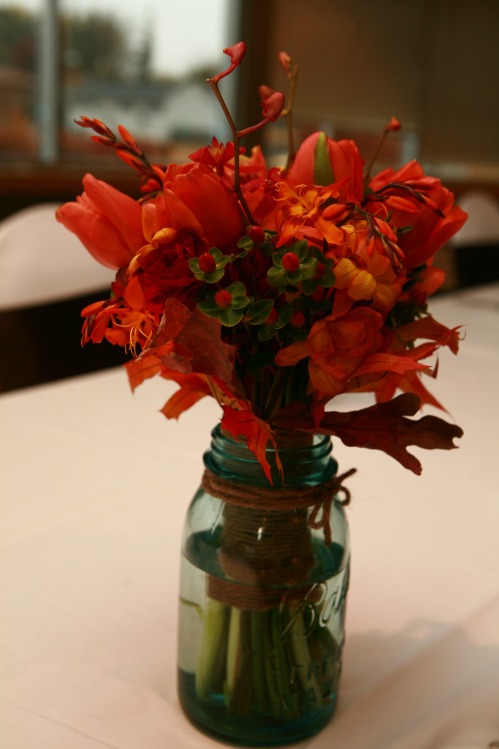
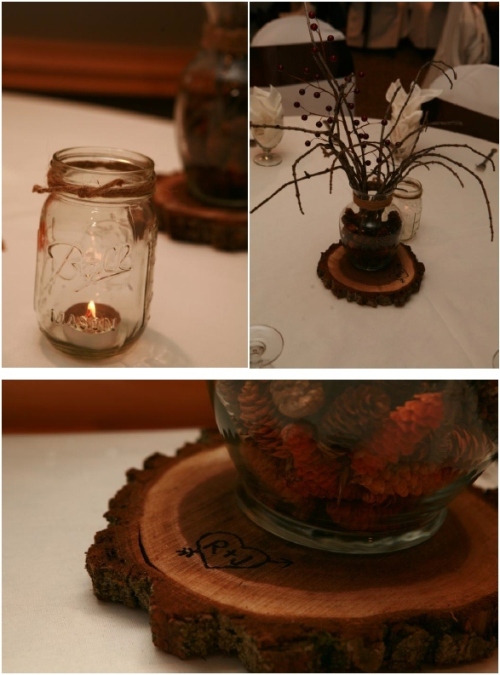 DIY #2: centerpieces. These were made from vases I purchased from thrift stores & garage sales (I never paid more than a dollar for each). I tied the mouths of the vase with twine and filled them with pine cones and sticks from my backyard, plus a sprig of decorative berries from the craft store (now being used as Christmas decor around my house). They were set on top of wood slabs my stepdad cut from a fallen tree. Lastly, I placed tea lights in small canning jars (again, tied with twine) next to the vases for a little romantic ambiance. Total cost for 25 tables? $32.
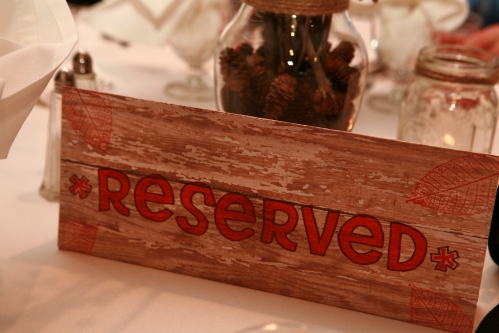 DIY #3: reserved signs. For the tables that were reserved for immediate family, I bought paper with a faux wood grain look from the craft store (55 cents each), traced “*reserved*” using a pack of letter stickers, and added a few subtle leaf stamps in the corner.
DIY #4: head table decor. The head table was lined with old-fashioned Ball canning jars (from my mom’s collection) that were tied with twine and holding my bridesmaid’s bouquets. Not pictured: small juice cups held tea light candles that were placed in between the jars.

DIY #5: cardbox. Here I glued together two round cardboard boxes from the craft store and added miniature bunting across the front, lace along the edges and twine on the top. Using the same letter stickers that I did for the reserved signs above, I traced “thank you!” on the top and added a button for the “o,” because just why the heck why not! Total cost? $12.
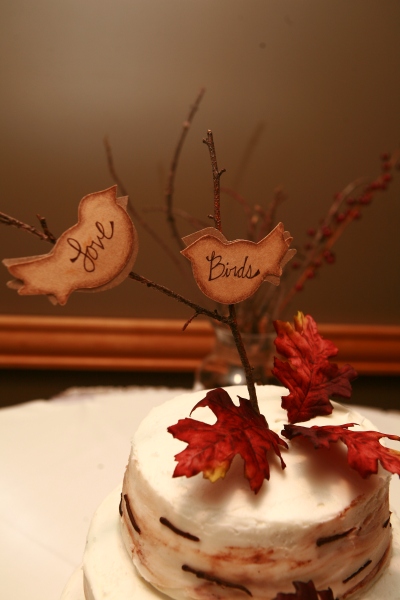

DIY #6: cake topper. Paper bird cut-outs (hand drawn by a friend) glued onto a stick (from the backyard, of course) sat on top of my birch tree-inspired cake, making this the cheapest DIY project of ’em all – around 50 cents. (Similar ones on Etsy run between $20-$30).
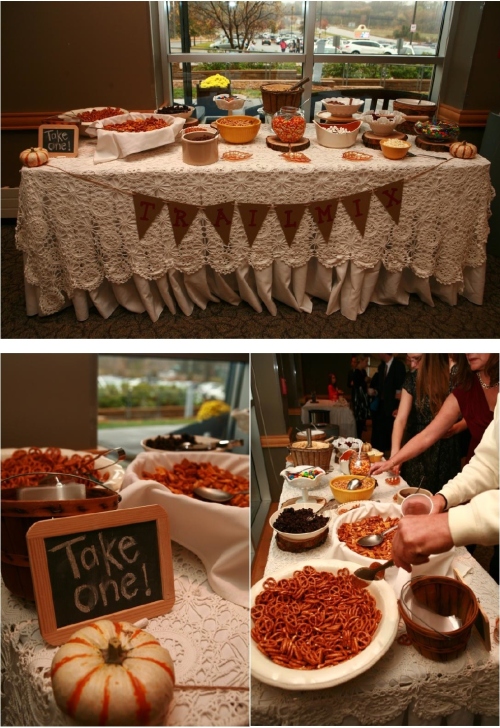

DIY #7: trail mix bar. While this was the most expensive “DIY” (around $75 because of the cost of ingredients), it was definitely the most worth-while and a huge hit amongst guests! The bunting triangles were purchased from the craft store as well as the letters to trace “trail mix” onto them. I strung them through a piece of twine that was held by two small pumpkins on each end of the table. An eclectic mix of bowls and dishes taken from my mom’s house were filled with an array of trail mix items and set on top of tree slabs.
There you have it! Are any of these ideas ones that you would recreate for a wedding or other event?!


