nursery transformation + tour.

then-and-now3

This post is long overdue! I actually took the majority of these photos at the tail-end of my maternity leave with hopes of getting this post up before October, but lo and behold, here I am 3 months later typing these words… Better late than never, huh? At least I got around to posting about the DIY driftwood mobile!

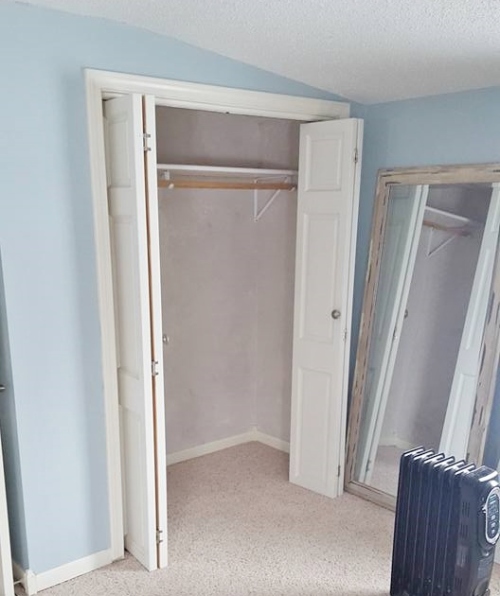
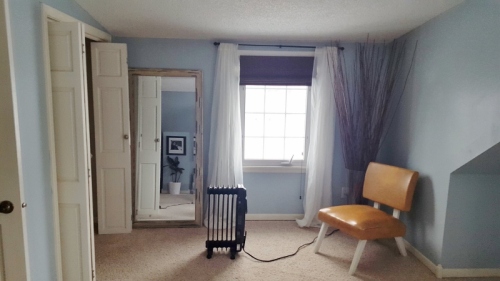
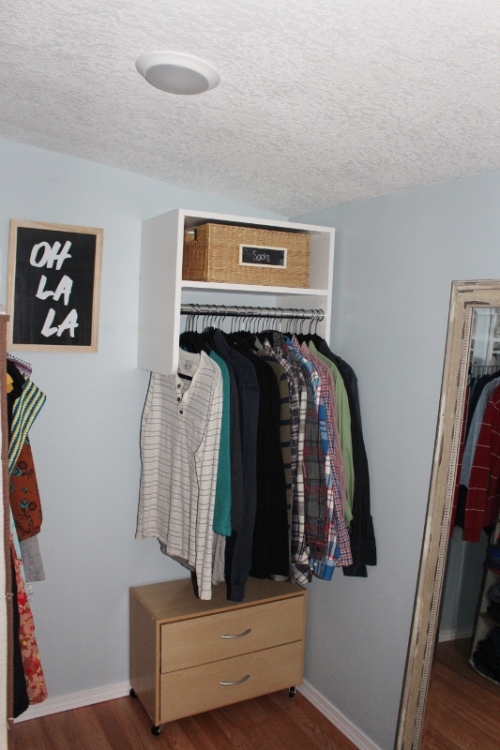
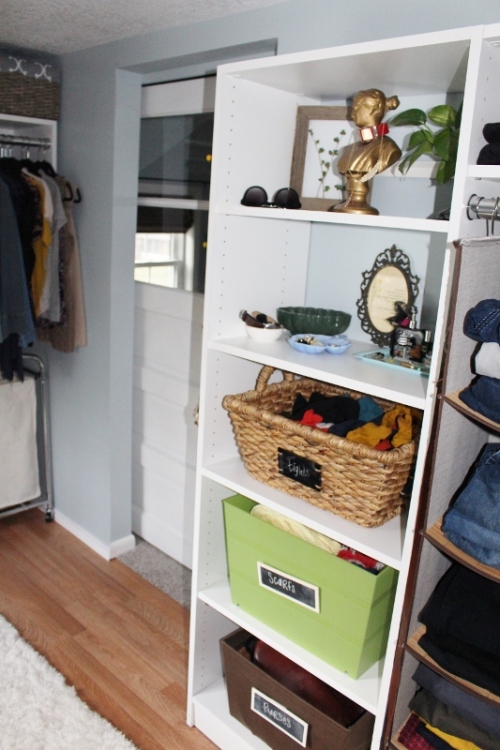
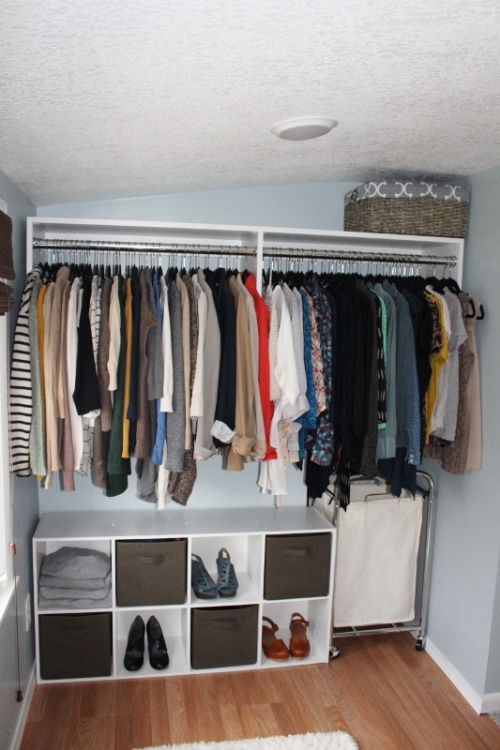
The “then” pics you see in the adjacent photos are from when our home was listed on the market back in 2012. Up until we found we were expecting, the room was a dismal space used for occasional guests and storing the hubby’s clothes (read about how we created a walk-in closet in our bedroom to mend this issue).

then-and-now-2

Prior to now, I had never put much effort into this room knowing full well that it would eventually be a nursery, and guests tend to use our basement bedroom anyways since it has an attached bathroom and is a little more private. The room was comprised of my old bed from college, two side tables, and a chair. In fact, it was such a ‘blah’ spot in the house that I never even took the time to take a photo of it. After letting it sit in that state for almost four years, transforming it into a nursery turned out to be even more gratifying than I anticipated and it ended up being the perfect space for our baby Fern.

So without further ado, here’s the grand tour:

nursery tour

I initially struggled with a “vision” for the room. I knew I wanted to use neutral shades and take notes from nature, but that was about it. I also knew what I didn’t want — a set “theme.” Think of it this way: your baby doesn’t start forming its own opinions for what it wants in its room for quite some time, so my No. 1 piece of advice for designing a nursery is to make a space you as the parent will enjoy since you’ll be spending a lot of time in there.

After finding out I was having a girl, the creative wheels started turning.

DIY driftwood mobile

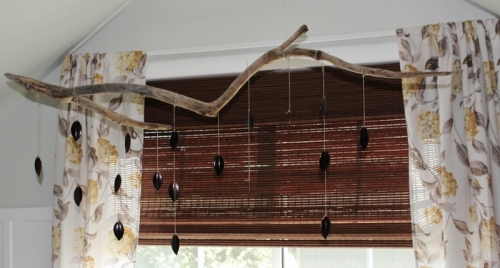
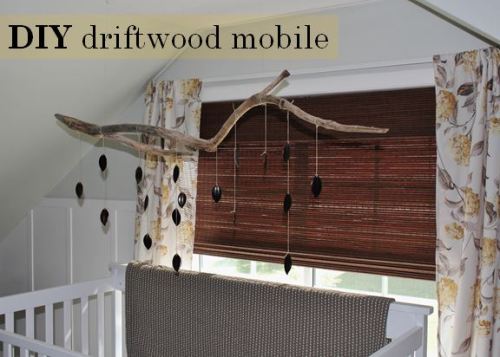
I started with making a driftwood mobile. That, combined with subtle floral curtains, set the tone for the whole room. I also took a lot of inspiration from other nurseries that I found via Pinterest. View my fave picks here.

nursery tour

One of my favorite things in the nursery is the faux board and batten on the focal wall. I used a similar process to what I did in the basement guest bathroom. This was a super easy (and affordable) way to up the charm factor in the space and make it feel more custom.

nursery gallery wall

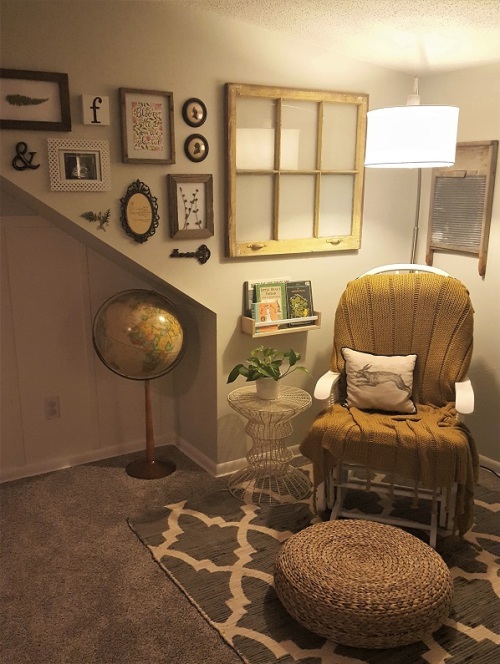
I created this gallery wall using a variety of frames and items collected over time from thrift stores and garage sales. For the “f” wall art, I simply traced a stencil onto a mini canvas square and painted it black. The two botanical prints are made with pieces of nature I found in my backyard that I simply pressed into the glass. The “bloom where you are planted” print is actually a .99 greeting card from Trader Joe’s. And what would a nursery be without a framed sonogram pic?

wall art

I was particularly drawn to this thrift store find because of its poeticness, and it just so happened to fit my yellow/gray color scheme and was yet another ode to nature. Score!

nursery tour

Sources from this space: The antique window + washboard are from a cousin’s farm; The vintage globe is from my grandpa; The book holder is a $3.99 spice rack from IKEA (all books were found via garage/rummage sales); The rocker was a $10 garage sale purchase (we painted the wood white and threw a Target throw over the cushions), The rug is from Hobby Lobby which I scored for 50% off; The side table was a purchase made several years ago from Home Goods; The floor lamp was a wedding gift via Target that was previously in the living room; The rattan IKEA ottoman was a Goodwill find.

nursery tour

Sources from this space: The vintage ladder was $20 from a flea market and the blankets hanging on it were gifts; The antlers were from a consignment store (I currently have this teething necklace I received as a gift handing on it); The armoire is IKEA and was left behind by the previous homeowners (it’s currently being used to store clothing items that are too big for Fern); The stitched lullaby art was from my nursery when I was a baby; The laundry basket is from Home Goods.

closet then and now

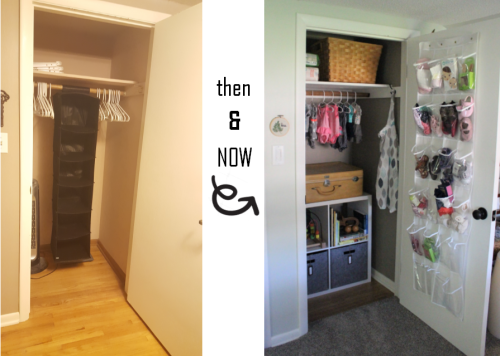
The closet got a fresh coat of paint and I screwed a shoe holder onto the interior of the door to store baby shoes, socks, tights, headbands, etc. I also added a 4-cube shelf organizer from Target for added storage of books and toys. The old suitcase holds extra blankets and bed linens.

nursery closet

fern embroidery

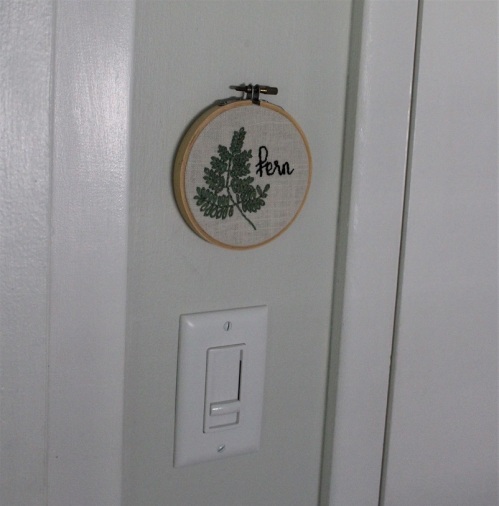
I had a local artist make this fern embroidery. Also, PSA for all new parents: dimmer switches are strongly recommended for the nursery (and mom & dad’s room)! They are super easy to install and prevent the need to blast a bright light when changing a 3 a.m. diaper, which is not fun for anyone.

nursery tour

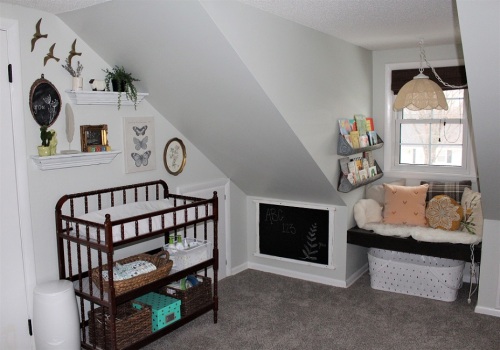
I got the changing table for $15 from a garage sale and outfitted it with quatrefoil contact paper that matches the rug under the rocker. Eventually I’d like to replace the changing table with a cool vintage dresser, but I have yet to come across one I like.

The little door to the right of the changing table is a storage space that I can already see becoming a cool hideaway fortress for Fern.

nursery wall art

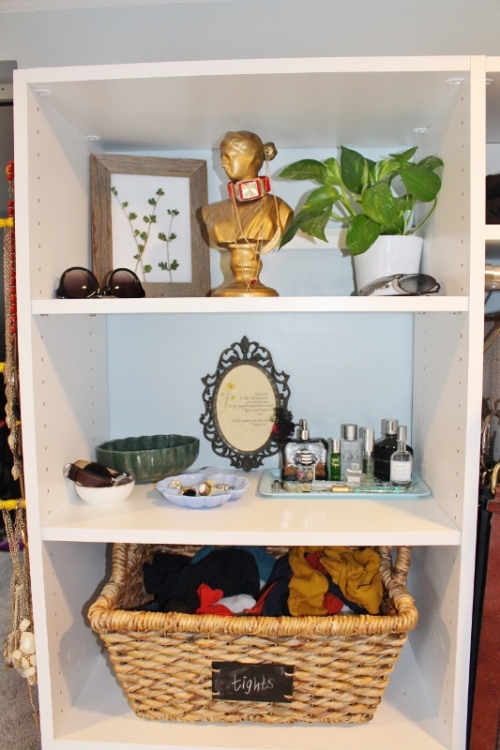
These shelves ($2.49/ea at Goodwill) were an ugly blue shade, so I painted them white and gave them a slightly distressed finish. It should come as no surprise that the majority of what you see on or surrounding them also came from a thrift store or garage sale, hehe! However, the butterfly print and faux plant at the top were IKEA purchases.

nursery reading nook

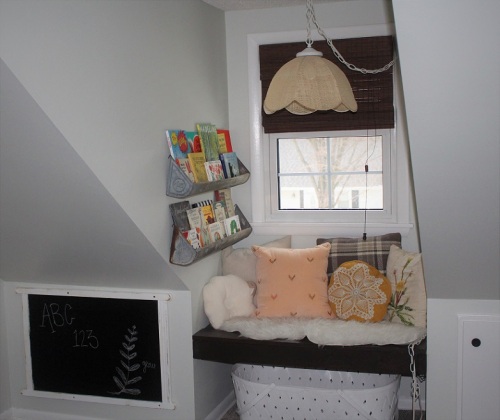
This DIY built-in reading nook is my favorite part of the room! After admiring all the quaint nooks I had pinned to my Pinterest board, I decided the nursery would be the perfect spot to install one. It was simple — we just anchored three pieces of custom cut 2×4 to the wall and topped it with wooden planks that we stained an espresso brown color to match the blinds.

The swagged light fixture was a $2.50 thrift store find back when I was in college. The repurposed chalkboard on the left is made from a vintage crib headboard that I bought for $10 from a garage sale. (I made chalkboards out of the headboard and footboard and a picture display from the crib spring which now hangs in our eat-in kitchen area).

chicken feeders as book holders

The books are stored in old chicken feeders that I picked up for $10 at a local antique shop. Fern’s book collection is made up a lot of vintage editions and classics that I am on the constant look out for at garage sales and thrift stores.

butterfly wall decor

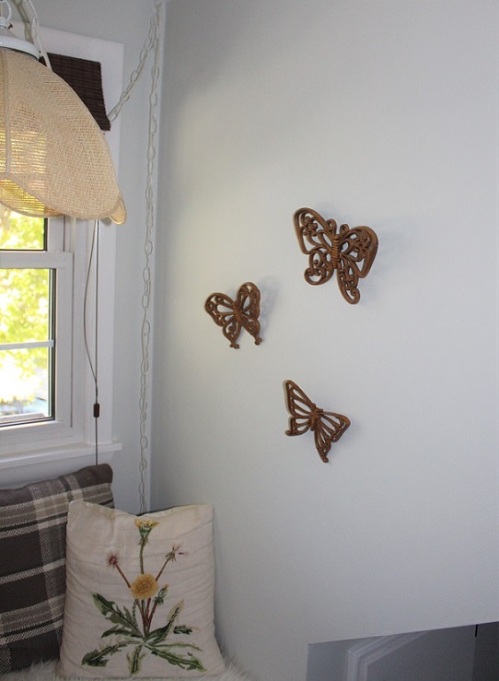
These wooden butterflies were a thrift store find. I see these all the time at Goodwill!

nursery reading nook

So cozy!

light fixture update

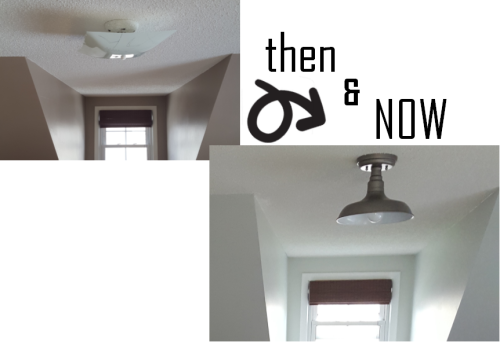
The ceiling light fixture was in major need of an update so I went with this industrial-feeling one I found online from Home Depot.

Other items to note:

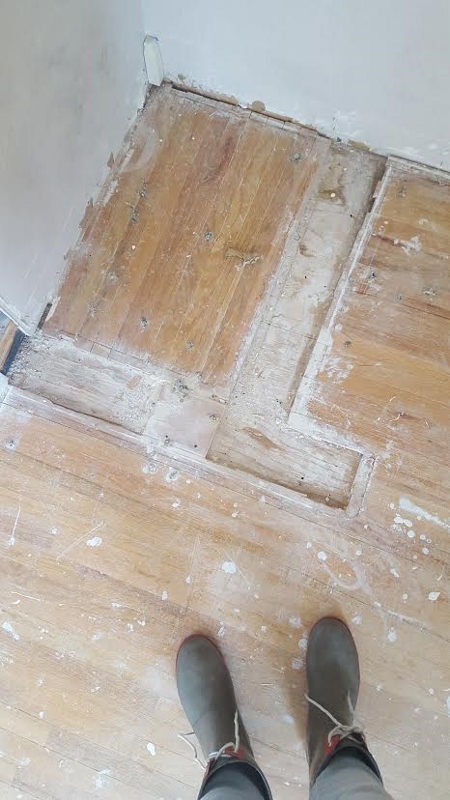
  • We had new carpet installed to match the carpet in our bedroom across the hall which also got a mega makeover during the walk-in closet project (an ‘after’ of that part of the room as yet to be posted). I wanted to keep the hardwood floors, but aside from the fact that they were extremely scratched up and would need to be refinished, there were areas that were missing chunks of wood and filled in with cement, so the easier option was just to get matching carpet in both bedrooms on that floor and make them cohesive. We also have poor insulation upstairs so the carpet helps with the warmth factor in the winter.
  • New paint color. I went with a light and neutral shade to give the room a fresh feel. The color is called ‘Stony Path‘ and is from the Valspar Hydrochroma line which is low odor and zero VOC. It’s a light gray with subtle blue undertones.

nursery tour

Thanks for reading!

1 Comment

Filed under DIY, House & Home

DIY driftwood mobile.

diy driftwood mobile

I have yet to post the nursery belonging to our new arrival, but in the meantime I thought I’d show you the nature-inspired mobile I made for the room for right around $10!

Last summer I collected a few cool pieces of driftwood from my friend’s lake house knowing eventually I’d find a way to incorporate them into my home, one way or another. Fast forward to the fall when I found out I was expecting and diligently began collecting nursery inspiration via Pinterest.

I loved the idea of featuring bits of nature throughout the room and knew the driftwood would finally come in handy!

Here are some of the ideas I had in mind:

nature-inspired mobilesDIY nature-inspired mobiles

Sources: 1 / 2 / 3 / 4 / 5 / 6 / 7

I knew right away which of my driftwood pieces I wanted to use, so the first step was hanging it from the ceiling. I did so using ceiling hook anchors and clear fishing line. The next step was figuring out what I wanted to hang from it! I originally thought I’d do a mix of feathers and fabric snippets, but then I came across this wind chime from Hobby Lobby for 50% off (so $8) that featured metal leaves which I thought would be a perfect fit for the look I was after. I took the leaves off the wind chime and hung them from the driftwood with some twine I had on hand.

DIY driftwood mobile

DIY driftwood mobile

Voila – DIY driftwood mobile! Being that the driftwood was free and I already had the twine + fishing line, the only cost was the wind chime and ceiling anchors, bringing the total cost to just over $10.

DIY driftwood mobile

DIY driftwood mobile

On the topic of driftwood, a few of my other favorite DIYs include towel holder, clothes holder, candleholder, curtain rod.

Stay tuned for the full nursery tour soon! (see a few sneak peeks on my Instagram or Facebook)

Leave a comment

Filed under DIY, House & Home

partial wall knockdown: creating better flow.

Hey all! Today’s post is showcasing a partial wall knockdown we tackled earlier this spring around the same time as the DIY walk-in closet project.

Our house is older (late 60s) and has a bit of a choppy layout, consequently making it so rooms don’t have the best flow between one another.  You saw a few years back we made our first attempt at solving the issue with this partial wall knockdown directly across from the wall that I am talking about today. That helped quite a bit, but I knew the wall across the way would have to be opened up as well to really achieve the “open concept” I was after (without tackling a full-blown remodel, that is!)

For reference, here’s how the space looked before we moved in with how the previous homeowners had it set up:

kitchen-area2

And here’s how it looks now that the wall has been knocked down:

wall knockdown
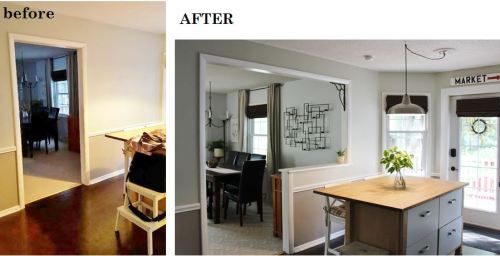
^view from the eat-in kitchen

wall knockdown^view from the dining/living room

Here’s how this project went down…

After analyzing the wall, we decided to hire the project out to a local contractor. This was for a few reasons — 1) we didn’t know if the wall was load-bearing (turns out it was), 2) there were outlets on each side of the wall, meaning electrical was going to be running behind the wall, and 3) from the exposed studs in our basement utility room we could clearly see pipes running up into that portion of the wall, so we knew there was more than likely going to be some re-routing of plumbing pipes involved. All three of those factors made DIYing this wall project not an option.Sometimes leaving it to the pros is the way to go!

before and after^view from coming in the back entry

From the above pictures, you can get a general idea of the demo process. After exposing the studs behind the wall, a header was put it in and both electrical and plumbing were re-routed off to the right. Once the drywall was up, it was mudded and taped. It’s also worth mentioning that because we were taking part of a wall down and using a licensed contractor, our city rules state that we had to have a smoke detector hard-wired into the space which you can see in some of the photos below. In addition, we also had to have a lead test due to the age of the house (thankfully we we had no issues there!) While these were added costs we weren’t initially anticipating (welcome to home remodeling 101), they were safety precautions that were necessary and worth the cost in the long run.

The last part taken on by the contractor was installing the trim along with a ledge made to exactly match the one in our kitchen, making the two ledges feel cohesive. To cut costs, we opted to tackle the painting portion which was the very last step of the project. And for a “cherry on the top,” I added an old metal corbel to the right hand corner of the opening to add some character that I picked up from Dwell, one of my favorite local shops.

Now let’s take a look at the “after!” Here are some photos of the space in its newly open glory:

2016-07-04 08.53.32 (800x596)
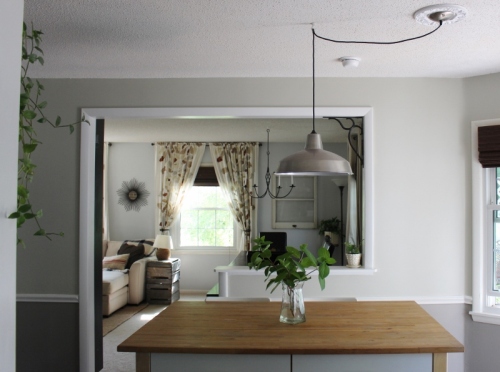
^view from the kitchen

eat-in kitchen
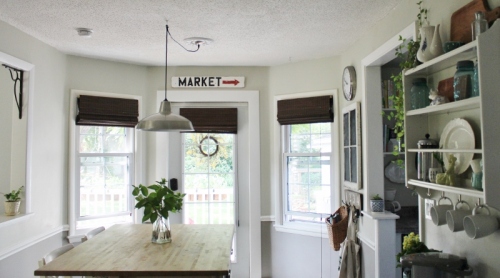
^ view from the hallway 

eat-in kitchen

eat-in kitchen

living space
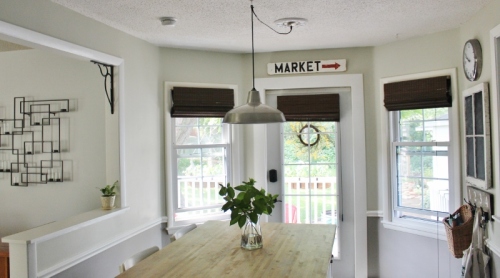
^ view from living room 

dining room^view from dining room 

It’s amazing how much more open the connecting spaces feel from knocking down a relatively small chunk of wall. It’s also been an added bonus to have so much extra light be let into the dining/living space from the windows in eat-in kitchen area.

For fun, here’s a look at what the eat-in kitchen area looked like shortly after we moved in compared to today (click to enlarge):

before and after

The main changes include fresh paint, the two wall knock-downs on each side of the space, the addition of blinds, a new light fixture + ceiling medallion, and the fun “accessories” such as my DIY chalkboard window, DIY ‘market’ sign, and DIY key/coat hook.

Other sources from this space — IKEA island (no longer available, but here’s their most similar one currently for sale), IKEA clock, IKEA plate shelf, Target 3-tier metal shelving.

I realize I have yet to provide an update of the actual kitchen’s facelift we tackled that took place last August (almost a year ago already — what happened to the time?!) which included an install of new floors (out with the chippy beehive-style tile, in with dark and classy bamboo) as well as new appliances. So hopefully I can get around to posting that update soon along with the nursery reveal!

Until next time!

Leave a comment

Filed under DIY, House & Home

deck makeover.

Hey all! I’m slowly but surely getting around to showing you some of the bigger projects we’ve completed around the house the past several months. (Check out the “small closet turned master walk-in closet” project here in case you missed it.)

Today I’m showing you our recent deck transformation! (View previous deck updates here)

deck before

A few years back we stained our deck with Behr’s weather-proofing deck stain. It looked pretty good for about a month, but it unfortunately didn’t take long for it to start wearing/peeling off (it actually happened so fast that I never even captured a decent picture of what the fresh stain looked like before it started coming off!)

We are not sure if it’s because it was simply bad stain or we did a poor job with proper prep prior to applying it (or both?), but either way, we knew the next time around we were going to hire it out to avoid the chance of it happening again. In addition to the discoloration on the deck, there were several boards closest to the house that were rotting and in need of replacement.

I did some inspiration-seeking on Pinterest and opted to go with a two-toned paint look rather than your typical stain. (See a few examples I liked here — 1, 2, 3). I figured it would give the deck a more custom look and also be easier for making touch-ups down the road.

Once I had a concrete idea of what I wanted, I hired a local business to do the honors! (If you’re in the Rochester area, check out Sean Krudwig Remodeling!) Sean power-washed, sanded, replaced 80 ft. of rotted boards, and painted two coats of white on the rails as well as two coats of gray on the base, and all within 4 days. While I am all for DIY-ing most projects, the combination of being pregnant (avoiding fumes) and the thought of painting all those spindles (yet again) made hiring this particular project out a no-brainer.

deck - before and after

deck - before and after 2

deck - after

deck - after2

Once all the painting was done, it was time for the fun part — the finishing touches! I had the hubs cut, paint & reinstall our trellis/lattice panels along the back of the deck to match the newly-painted white rail. We also added back our tiki torches, outdoor hanging lights, and some hanging plants + deck planters. Lastly, I decided the space was lacking color so we painted the back door red to match our front door for a pop! I love how it turned out.

Here are a few more “after” pictures:

deck planter - herb garden

Our herb garden is doing great!

deck - after

The ground cover I planted in this space is really thriving. I had to transplant the other items I previously had in this spot because of how much it was taking over. (You can see what this little area used to look like when it was just filled with landscape rock and got a much-needed garden upgrade.) For $10, I also replaced the lattice that you see there with a white plastic piece cut to size. The previous strip was wood and no longer matched the deck colors, plus it was starting to fall apart.

deck - after

outdoor entertaining

outdoor space

outdoor entertaining

outdoor entertaining

outdoor space

The deck went from being an eyesore to a place people actually want to hang out!

Down the soon-ish road I’d like to swap out our current high-top dining set for built-in benches and an actual dining table to be able to a) add storage and b) seat more than four people (see inspiration below). But that’s for another day ;)

inspiration{find sources for above photos from my Pinterest board}

Until next time!

3 Comments

Filed under DIY, House & Home

DIY walk-in closet.

closet makeover in at home magazine

Hey everyone! Today I’m talking about one of our recent home projects that was featured in this month’s issue of At Home Magazine: the making of a walk-in closet in our home’s master bedroom!

closet makeover snapshot

Let’s start from the beginning…

The master bedroom in our home is fairly large. A dream for most homeowners, right? Well, that’s not always the case. For us, the issue was that the room being so large presented a lot of unused space yet didn’t solve our need for a larger closet. (Check out this old blog post to get an idea of the space).

closet before

For the three (almost four) years we’ve been living in our house,  I used the small-ish closet in the master (pictured above) combined with a dresser placed in a different part of the room, while my husband used the closet in the guest room across the hall to store his clothes. But with a baby on the way who would be taking over that closet, I knew we needed to address the situation sooner rather than later. The first option was for me to heavily pare down my wardrobe to make room for the hubby’s clothes. (What fun is that?!) Instead, I had a better idea…

closet before

What if we demolished the current closet, built a wall to close off that part of the room, and ultimately created a full blown WALK-IN  closet? My husband thought I was crazy and pointed out that by building a wall we’d be blocking a window in the room. My solution? Simply have the opening be directly in front of the window and use a door that had a glass pane on top to let light shine through. He couldn’t argue with that and started coming around to the idea. And thus the project began…!

closet makeover steps

The first step was to demo the existing closet, rip up the carpet, and start with a clean slate of space.

The second step was to build the frame for the closet followed by hanging drywall. To save money, we tackled all the above DIY style and enlisted the help of a fellow DIY-savvy friend. (Thanks, Ryan!)

closet makeover progress

From there, we hired a few professionals to do the mudding, taping, (this included scraping and refinishing the ugly cracked popcorn ceiling) as well as installing electrical (two LED ceiling lights + a dimmer switch). These weren’t costs we anticipated at the start of the project, but they were well worth the investment in the end.

damaged floors

After that, it was back to DIY. We took on the painting, trim install, laminate floor install (the plan was to keep the original wood flooring we found underneath the carpet but it was damaged beyond repair — see photo above), closet system configuration and install, and finally the door install.

sliding closet door

sliding closet door

The door was an original storm door on my grandpa’s house that had been used as yard décor in my mom’s garden. She was generous enough to give it to us knowing it was just what we were after. We gave it a good cleaning, cut it to size, painted it, and hung it on sliding door tracks that we bought off of Amazon — luckily these are much cheaper now than they were a year or two ago! (Psst — you can see the other DIY sliding door in our house here.)

closet after

closet after

closet after

The last part of the project came down to organizing and accessorizing. To make things orderly and easy-to-find, I opted for a variety of bins and baskets rounded up from around the house, DIY chalkboard labels and matching no-slip hangers that were on sale at Costco ($8 for a 35 pack!) Adding a rug, floor mirror and an assortment of décor items I already had on hand completed the project.

closet after

closet after

closet after

closet after

The bedroom is now better suited for our needs and we have more closet space than we know what to do with!

Side note: Shortly after we wrapped up this project, I saw interior designer Tera Janelle had completed an almost identical walk-in closet project for one of her clients. It’s crazy how similar it is! Check it out here.

SOURCES:

  • Laminate floor: Home Depot
  • Closet system: Easy Closets
  • 8-cube cubby organizer: Target
  • 2-drawer stackable floor organizer: garage sale find + added wheels (find it at Menard’s)
  • Baskets + bins: from Target, Home Goods, garage sales
  • Closet door: vintage, gifted
  • Sliding door hardware: Amazon
  • Paint color: Herringbone by Valspar
  • Mirror: Home Goods
  • Black non-slip hangers: Costco
  • Shag rug: Target
  • 2-bag laundry sorter: Amazon
  • ‘Oh la la’ wall art: Hobby Lobby
  • Necklace holder: garage sale

Check back soon for my next post featuring how this closet project changed the layout of the rest our bedroom!

Leave a comment

Filed under DIY, House & Home

updates & things.

This has definitely been the “year of projects” at the Caban casa which has been making for lots of fun and exciting changes around our home. The issue? I haven’t been updating this blog with the deets! Once one project ends, a new one begins, or so it seems anyways. And who has time to document it all when you’re knee-deep in a DIY?! It also doesn’t help that my laptop copped out recently…

So rather than put each project posts out one by one, for now I am going to give a brief overview of what’s been done and what’s currently going on (you can see a few snapshots above, but I have more detailed pictured posts coming soon).

Here it goes:

You saw some of the summer projects I tackled here which included a fire pit makeover, installing [the start of] a stone path along the side of the house + an arbor, adding patio lights, sprucing up the garage door with some hardware, and making a DIY nautical wreath for the front door. There were also some other things that weren’t documented like a few landscape updates and new house numbers.

Other projecty/DIY things that took place in the last few months or so:

  • Install of a new Energy Star AC (not very exciting but yay for energy savings!) as well as a Nest thermostat (read more about the Nest over on the Young House Love blog, which is where I first learned about it).
  • New bath + shower installed on second level. This was definitely not a planned project, nor a cheap one, but a crack in the tub made this a “need to take care of NOW” project that we hired out to ReBath.
  • New black matte door knobs installed (see here) on the main floor to replace the antique brass lever ones that our dog could open. Up next is the bedrooms + bathroom on the second level.
  • New paint in the basement. When we first moved in I painted the room a teal color (see that here) but later decided it wasn’t the best choice (for my taste) in that room. I opted for a more earthy-tone and painted it a subtle olive green in the shade ‘Curly Willow’ by Behr.
  • Kitchen makeover, part 3! Installation of new flooring + appliances. You can see my past kitchen projects here & here.
  • A few new light fixtures installed: eat-in kitchen (brushed nickel warehouse pendant), main floor bathroom (allen + roth 2-light hainsbrook standard vanity light), master bedroom closet (LED ceiling flush mount light).
  • At the tail end of fall I helped my mom with some curb appeal projects. This included installing the same garage door hardware I used for my house, plus picking out custom shutters & a gable vent to spruce up the house’s facade (see a snapshot here). She has a few other projects she’d like me to help with this spring that includes replacing the house numbers for a more modern option, adding window boxes, and possible opting for a new front door color.

Current projects:

  • For the past month now we’ve been making updates to the master bedroom. What started out as a “simple DIY closet expansion” one weekend has since turned into a full-blown room makeover with new flooring, lighting, scraped ceiling, a new furniture arrangement, etc. The end is finally in sight with this project and in the meantime, you can follow updates on my Facebook page!
  • Organization nation. I’ve been on an organizing kick since the start of the New Year. This entails getting rid of things that aren’t serving a purpose and making it so everything has a place. Some of the areas tackled so far include the pantry, bathroom vanities + medicine cabinets, the linen closet, bedroom closet, plus more. (Side note — I have yet to read the Marie Kondo book about the “KonMari” method of organizing, but would definitely like to in the near future! Have you read it?)
  • I am now writing monthly features for Rochester’s At Home Magazine. You can view the recent ones I’ve done here:

Upcoming projects:

  • See this wall right here? Well it’s coming down. Partially, anyways. To make the feel of our kitchen + dining space in the adjoining room more ‘open concept,’ we’ve elected to do a partial wall-knockdown from above the chair rail. Since the wall is load-bearing and likely has electric + plumbing running behind it (wah, wah, wah), we’re hiring this one out to the pros.
  • Project nursery. That’s right — a baby will be in the mix soon (July 2016), so transforming one of our guests bedrooms into a nursery will be next on the to-do list.

So that’s my latest project recap in a nutshell. I look forward to updating you with some detailed photo posts soon. Until then, however, follow my Facebook page for updates as that outlet gets posted to much more often than the blog.

Leave a comment

Filed under House & Home

pumpkin chocolate chip muffins (vegan).

pumpkin chocolate chip muffins

It’s fall which means all things pumpkin have made their way to the local grocery stores and coffee shops, and — if you’re like me — it has even invaded your kitchen, too!

Today I’m sharing a recipe I am loving that would be perfect for a fall potluck or just to have for a grab-n-go breakfast around the house. The whole wheat flour gives the muffins heartiness and the coconut sugar plus chocolate chips give them a perfectly balanced sweetness.

pumpkin chocolate chip muffins (vegan)

Makes approx. 15 muffins

Ingredients — always use organic ingredients when possible!

  • 1 ½ cups whole wheat flour
  • 1 can pureed pumpkin
  • 1 ½ cups coconut palm sugar
  • ¼ cup coconut oil, melted
  • 1 Tbs ground flaxseed
  • 1 Tbs pumpkin pie spice
  • 1 tsp cinnamon
  • 1 tsp baking powder
  • 1 tsp baking soda
  • ½ cup vegan chocolate chips

Directions:

Preheat your oven to 350 degrees. In a large bowl, mix together the pumpkin, sugar, ground flaxseed, melted coconut oil and spices. Slowly add the flour, baking soda and baking powder while stirring. Add the chocolate chips last. Pour mixture into prepared muffin pan lined with cupcake liners and bake for 15-20 minutes, or until a toothpick comes out clean.

Enjoy!

NOTES: You could use a different sweetener (maple syrup, agave, or cane sugar) in place of the coconut palm sugar, but I opted to use coconut for this reason:

According to Dr. Andrew Weil, “Coconut sugar is 70 to 79 percent sucrose and only three percent to nine percent each of fructose and glucose. This is an advantage, because you want to keep your consumption of fructose as low as possible, and cane sugar is 50 percent fructose.”

Coconut sugar has a taste similar to that of brown sugar and can be substituted for cane sugar in most recipes. Find it at your local Trader Joe’s, Whole Foods, or co-op.

1 Comment

Filed under Recipes

fire pit makeover + other DIY outdoor projects.

It’s been since March since I last posted?! How did that happen? I gotta hand it to all those bloggers out there who are able to carve out the time to make multiple posts each week, or just once/week for that matter. I certainly am not one of them — (read more about that here). But to that note — I do make a point to update my Facebook and Instagram relatively frequently, so if you want any “Simply Chic” updates, I encourage you to follow me there!

Anyway, with fall on its way, I figured I’d better take the time to highlight a few of my outdoor projects from the summer before snow is falling and they’re a distant memory.

before and after fire pit

First up is the outdoor fire pit! This wasn’t really a planned project, I just got impulsive one day and decided it needed a makeover. The fire pit was so rusted that ashes would fall out of the bottom and the cinder blocks surrounding the pit were noticeably uneven.

firepit before

I decided to start from scratch so I tossed the fire pit and removed all the rock and cinder blocks. (This was no easy feat!)

fire pit makeover progress

After I removed the pit, rocks and cinder blocks, I decided to widen out the area surrounding the pit to make it slightly larger.

DIY fire pit - after

I purchased a galvanized fire ring from Menards (I figure this won’t be as susceptible to rust like the one we had before) along with some pea gravel and used larger rocks found in the gardens around my yard to create the new fire pit. A few hours later and ta-dah — we had a new outdoor fire pit! All in all, the project only costed me the fire ring and a few bags of pea gravel, bringing the total cost to right around $50.

What do you think of the transformation?

—-

So while I’m here, let me show you a few snap shots of other projects I tackled this summer:

arbor

While I was at Menards getting the needed supplies for the fire pit makeover, I spotted this arbor that was on sale plus had a $40 mail-in rebate. I’d been wanting to get an arbor for the side of the house for quite some time, but all of them seemed to be around $200 which I wasn’t willing to spend. With the sale and rebate, this particular one came to only $50, so I pulled the trigger!

I had acquired some flagstone rocks that I used to start a pathway that will eventually go along the whole side of the house. I also plan to grow a clematis up the side of the arbor. One step at a time!

nautical wreath

Not too long ago I bought a pretty beaten-up wooden ship wheel from Goodwill for about $3 that had a bunch of corny beach-themed stuff hot glued onto it — something like this — but worse. I knew it could become something cool so I snatched it up. I pulled off all the attachments, sanded it down and spray painted it. Lastly, I wrapped some twine around the outer part and viola — a nautical summer door wreath!

DIY outdoor patio lights

If you follow me on Facebook, you might have seen that I’d been talking about wanting to string patio lights on my deck. The only issue was I couldn’t figure how I was going to attach them to the side of the deck where the railing only goes a few feet up. I searched my Pinterest board and found this tutorial that gave me the idea of simply attaching long wooden lattice pieces to the side of deck and adding a some eye hooks to string the lights through. (You could put the wooden poles into the centers of planters like they did in the tutorial, but I didn’t want to clutter my already-narrow deck so I opted to screw them into the deck rail). So with the two boxes of string lights I got on sale at Target plus the wood pieces and eye hooks, this project came in at right around $25.

You can view a few of the other changes we’ve made to the deck HERE. Next up is a new coat of deck stain or paint (the one we went with last year had been peeling off, ergh) and possibly DIY built-in pallet seating in place of the dining set. Check out this example!

adding garage door hardware

Last but not least, I purchased a garage door hardware kit from Home Depot to add a little somethin’-somethin’ to the look of our garage. For a mere $19 plus 15 minutes of my time, this gave the garage door a major upgrade and custom feel. This is a great solution for any one looking for cheap + easy ways to enhance their curb appeal!

So there you have it — a roundup of some of the main outdoor projects I tackled this summer! Would you consider adding any of these projects to your to-do list next year? I’d love to know!

1 Comment

Filed under DIY, House & Home

closet clean-out & DIY shoe shelves.

Is anyone else in spring-cleaning mode? In the last month or so I’ve been on a mission to tackle a lot of the projects I’ve been putting off far too long,  primarily the ones that are easy to ignore because guests of the house don’t see them, i.e. behind closet doors, cabinets, etc.

I realized I’ve done quite a few “big” projects and room makeovers around the house, so it was finally time I start tackling the smaller, not-so-fun guys. Exhibit A: our front coat closet.

coat closet beforeThe only thing this coat closet had going for it was the matching wooden hangers (thanks, IKEA), but it lacked organization and functionality. The walls were still sporting the sponge paint from when we moved in (see more of that repulsive paint here or here), shoes were always falling off the rack, the hanging shoe organizer was dirty and falling apart, and the shelf in the closet was too high for there to be a large enough clearance to get anything on top of it without spending five minutes shimmying it up there.

coat closet makeover

The first thing I did was take absolutely everything out and gave the close a fresh coat of paint to match the predominant color that we used throughout the house.

From there I re-installed the upper shelf and coat rod, but hung it slightly lower so that there would be a larger clearance to easily fit bins up top.

DIY shoe shelves

After seeing this awesome closet makeover, I decided the best way to house all of our shoes was to make built-in shelves.  This was super easy and something I would recommend for anyone with a similar closet layout. I bought two long boards at Lowe’s, had them cut to the size I needed, and gave them a few coats of paint. While the shelves hold quite a few shoes, there still wasn’t room for all my flats (what can I say, I have a thing for shoes!), so I purchased a new shoe hanger to store the ones that didn’t fit on the built-ins.

DIY chalkboard labels

Lastly, I made chalkboard labels for the up-top storage bins to store out-of-season shoes and winter apparel. To make the labels, I taped off a section on wood planks from the craft store and painted them with chalkboard paint. I then hot glued them to these plastic crates I had bought on clearance at Target.

coat closet makeover

The one thing I have yet to do for this space is to install a row of hooks (something like this) along the left inside wall to hang things like backpacks, purses and umbrellas. I like packing as much storage and organization capability into a space as possible because a) it only makes keeping the house tidy easier, and b) it helps the home’s resale value.

What do you think of the transformation? Is this a project you’d consider tackling in your own home? I’m not going to lie… this particular closet clean-out now has me wanting to do a revamp of all the closets in the house…

Stay tuned for more spring cleaning and DIY projects!

Leave a comment

Filed under DIY, House & Home

basement living room before + after.

Hi friends! I thought I’d take this lazy Sunday to show you a room makeover, as well as a mini gallery wall project I finished a few months back, which you saw a sneak peek over on my Facebook last week.

But let me give you a bit of background on this room first…

When we moved into our house, the basement was considered “finished,” but you’d never guess it by looking at the cold cement floors (covered with accent rugs), stark white walls and the surplus of cobwebs, not to mention all of previous home owners’ furniture and decor that wasn’t living up to the room’s potential.

Within the first week of moving in, we did a cleaning overhaul, threw some some color up on one of the walls for a pop, and had carpet installed from Lowe’s. The next phase was finding furniture that best fit the space (there’s already been some changes, including the coffee table switch-out which you saw here, and a chair swap which you’ll see below), and my favorite — adding in decor!

So are you ready to see how this space has transformed? Take a look!

BEFORE (MLS listing) PICS:

basement3 basement2  basement1basement4

PROGRESS PICS:

029002  024 026

Above shows what the room looked like a few months after we moved in. It was definitely an improvement from the ‘before’ state, but it still didn’t have that “finished” feeling and I soon realized a few of my furnishing choices (i.e. bulky coffee table and swivel tub chair) weren’t helping any. Fast-forward to today…

NOW PICS:

basement

You already saw ^this picture^ from the trunk makeover post, but I went ahead and took some of the other sides of the room so you could see the full monty.

basement

basement bar

basement

^cafe curtains disguise the electronic storage area and the ‘LOVE’ wall art conceals the electric panel.

reading nook

^need an ottoman? turn a wicker basket or wooden crate upside down and add a pillow!

The main goal for this space was to make it a hang out area which people actually want to hang out in, unlike before. This was achieved by giving warmth to the room with a simple carpet install, adding floor-length curtains (despite the small windows), making it feel homey with the right use of furniture and decor, and of course — adding in the “fun” hang-out features, i.e. a bar, mounted TV and surround sound.

As you probably could’ve guessed, I’m not calling this room “complete” by any means because there will always be an impending project just waiting to happen… Some ideas include painting the cabinetry below the TV, giving the countertop some sort of treatment (cement, perhaps?), and/or changing the accent wall to a new color. I’ll keep you posted!

Check back again soon!

Leave a comment

Filed under House & Home